|
My slow time generally begins around Thanksgiving, however during the winter of ''99
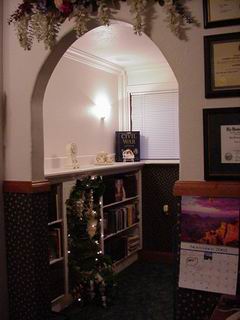
Lauri graduated from college with a Master's degree in psychology. This signalled an urgent need for an office to see her patients and a library to display the mountain of tomes she collected from eight years of college. Shortly after the library was completed she discovered a library does not an office make - it was too crowded and too informal, so I expanded into the adjoining room to make space for her office.
This archway takes you out of the library into the office proper.
MDF was the material used
throughout the entire project. The rosettes, the cleats, the trim...just about everything
is MDF. And, I can't tell you what a joy it is to work with, but
its a dusty proposition from the word go. A lot of the finishing
touches for the library and office were completed right here on
the site so, if you decide to undertake a project like this be
sure to keep dust control in mind.
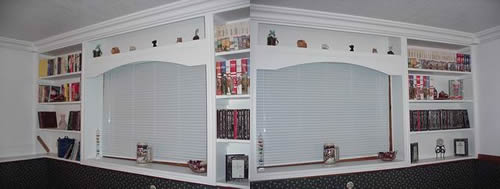
I wanted to continue with the same theme
in the office that I previously used in the library...
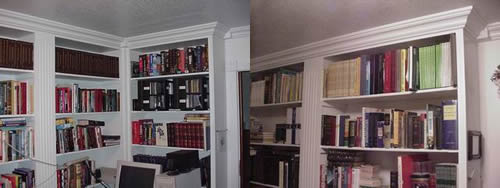
...I
chose to use a modular concept then trimmed the bookshelves after
they were installed. The carcasses were assembled in the shop
then transported to the site. The toe-kick was laid on the floor
first, then each carcass was placed into position and secured
to the wall. Each unit was sized according to the available space.
For instance, in the left photo above, look where the two come
together - instead of bumping two shelf units beside each other,
I purposely shortened them and added a wider face trim...
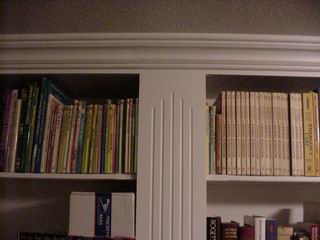
The
flutes were machined on my router table
and, to maintain continuity, I carried the same design on over
to the trim for the door and windows...
The
rosettes were turned on the lathe.
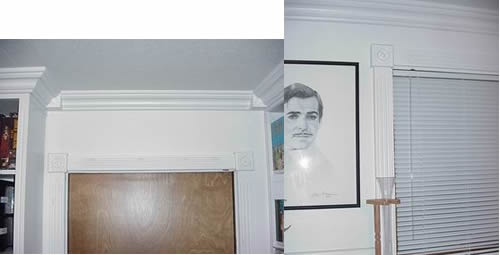
I wanted the crown moulding to be something I'd never
seen before but at the same time I wanted it to be somewhat Victorian. Here's what I did.
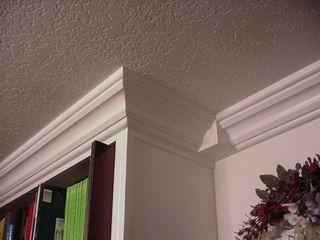
At
each inside corner I didn't want a simple miter - it needed to make a statement. So,
Victorian takes a sidestep and introduces a Grecian influence (Gretorian??).
It's simply a three-sided cube (see photo a little further on). Then, the three pieces that make up the crown moulding
are applied and you end up with what you see here.
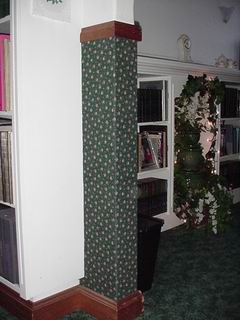
Let's say you have an area you want to dress up...you then can take the crown moulding and apply it vertically from
the bottom of the block and terminate in a certain area. Like
here...
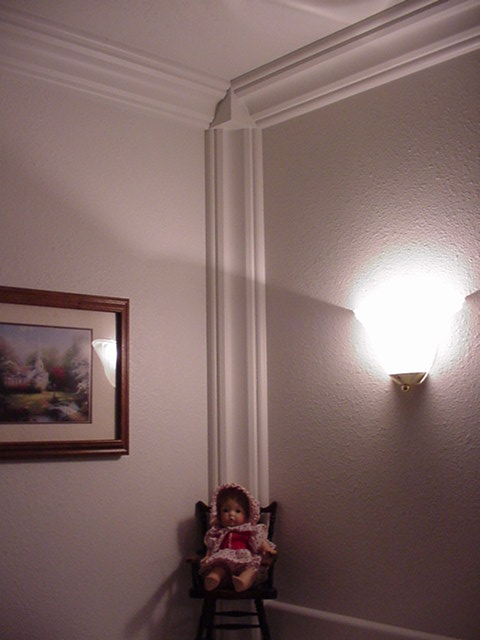
...which
in this case terminates on top of a low set of bookshelves.
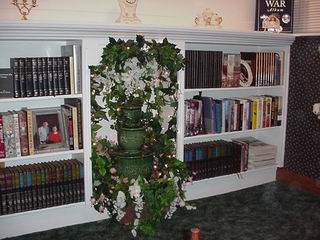
I
left the center section full height because Lauri wanted a fountain in this formal setting. She's right, it's a nice touch and I have to say it's really pleasant to go in there and sit down
with a book, or nap. It was my first attempt at fountain-making and I
had a surprising amount of fun doing it.
The trim under the ledge
is a scaled-down version of the crown moulding used on the ceiling.
On
the opposite wall is an elevated set of bookshelves on either
side of a window. This room is only 10' square, but for some reason,
perhaps because of the fountain, it seems much larger.
Here
are the components that make the entire crown moulding assembly.
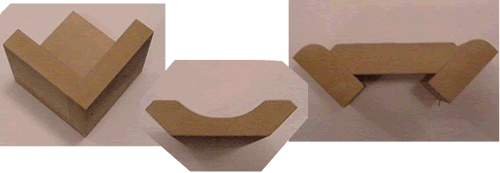
On
the left is what I mentioned earlier, it's simply a three-sided
cube. The dimensions of the cube are governed by how wide you make the center
moulding, which in my case is 3 1/4" from point-to-point.
The center is a cross section of the central component. I fabricated
each detail of it on the table saw, including the cove. And, on
the right are all the individual pieces that make up the crown.
I purposely avoided showing a cove here so that you can envision
what a detail of your own would look like in this configuration.
Since everything was going to be painted there is no fancy joinery; the
corner blocks and shelf carcasses were stapled together (everything
else was brad nailed) and butt joints were used on the shelves and reinforced with cleats.
For
the finishing touch I sprayed on a primer followed by two coats
of a 100% acrylic latex paint. I sealed myself inside the space,
masked off what I didn't want painted and went to town painting
everything else.
How I was going to treat the walls was a tough decision; I didn't want everything painted and I loathe wallpaper but, I thought, what about fabric? Lauri and I went straight to Wally World and she picked out the pattern you see below. After covering the walls with sound board the fabric was applied using an upholstery stapler.
To trim out the top edge I made a two-piece Mahogany chair rail. Voila!
Ttthhhaaat's
all folks! She loves her office and library and
that's what counts. |