You have arrived at a special page. This is the pictorial rest of the story of how my sitting scroll saw station
came to be.
Are you aware I wrote a story to accompany these photos?
If you haven't read this account then I suggest you not spoil the moment by viewing these photos just yet. Go
HERE to read what the news is then follow the link back here.
Scroll down if you're ready to take this pictorial tour.
Research & Development
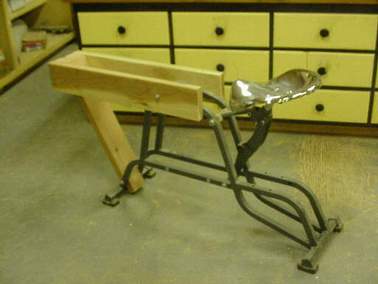
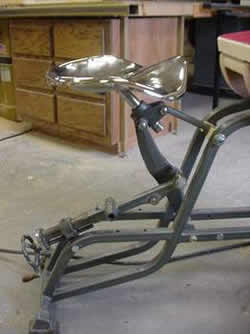
I got started by figuring out where the seat needed to be placed - in the machine's previous capacity as a torture device, the seat was located about 12" further forward from where you see it now. The wooden members will provide eventual support for the top. At this stage I'm still trying to figure out how to secure the seat.
Going Up?
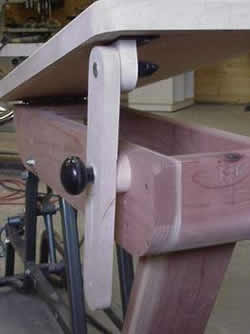
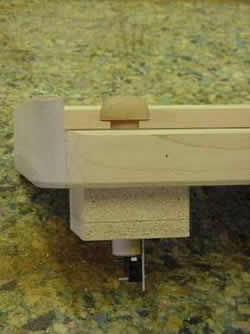
The countertop is standard; hardwood is applied to the edges of the particle board substrate, plastic laminate is adhered, the corners radiused and finally a chamfer is cut around the edge. You can raise or lower the top so the relative angle of the scroll saw can be adjusted to the seated operator. A strip of piano hinge is used to provide this pivoting action. Lastly, something was needed to secure the top in position and this was accomplished with a knob salvaged from a previous shopping trip 
Saint Vidas Dance
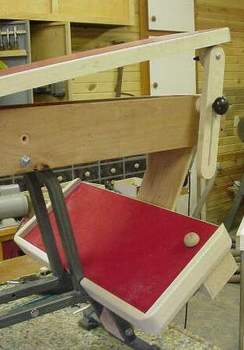
With the top completed, I sat down gingerly on the unsecured seat and pretended to be at work. The major problem I encountered was positively reaching the switch during that critical moment you needed to turn the machine off. So, a method to switch it on and off instantly had to be incorporated in the design. Sitting there I realized that my feet were uncomfortably resting on the floor. What if I raised them up and rested them on something?
Hummm... What if that something contained a foot switch?
Go Get Me A Switch!
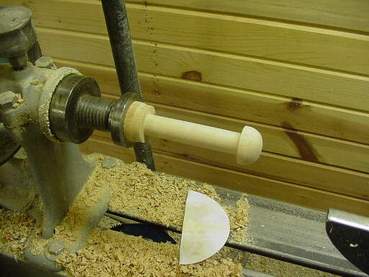
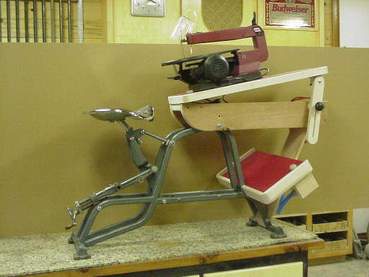
Making the foot board was easy, incorporating a switch was a little more difficult - luckily, I'm a mechanical genius. I'm not a hoarder but saving things that remotely looks like it might be used elsewhere makes projects like this one a breeze. The only thing I didn't have was something to actuate the switch - here it is being turned on the lathe.
What's In The Box?
The actuator is part of the switch assembly, along with a spring, a microswitch, an 1/8" pin and a metal bracket. A hole was drilled into the foot rest then the spring was slid onto the shaft of the actuator. A hole was then drilled through the shaft to accept the 1/8" metal pin, which is needed to keep the spring. The purpose of the box is to protect everything and provide a surface to mount the microswitch. So, when you step on the actuator the switch makes then returns to the off position when you remove your foot. It's all quite simple really.
Take A Seat
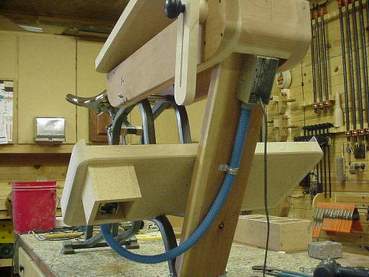
While other things were going on I pondered on how to secure the seat. Take a look at the column supporting the seat - with three pivoting points something had to hold it steady or it would fold up and throw you onto the floor. In the story I said the seat adjusted in relation to the handle bars and they did this by using a threaded device attached to the pivoting seat support. It dawned on me that I could use the same device, only reengineer its capacity. Now the seat is secure and can be adjusted to provide even more comfort for the operator.
It's Electrifying!
The next step was the power and I knew three things;
it needed to be supplied to the foot switch, a task light needed to be permanently attached to the machine and the light couldn't be hardwired to the foot switch. I accomplished the last one by removing the linking tab
from the outlet to create a "switched" outlet - now the light stays on when your foot is off the switch.
Ladies and Gentlemen, allow me to introduce...
"Mrs. Wazooni"
She's my greatest
urban refuse transformation to date
and this is a REALLY good thing
Hey! Rube Goldberg...eat your heart out!